 Guides
 Dangers
- Noah size flood
- Screwdriver
- Wrench
- PTFE tape
- Silicon grease If in doubt call a professional!!
- Help Forum
Tools needed
Tap repair
READ THE DANGERS SECTION
The idea of this is so you get an idea of your system, so you know if your engineer is doing his job correctly, if you attempt a repair yourself,be careful
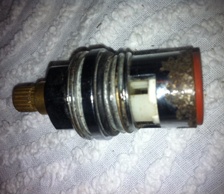
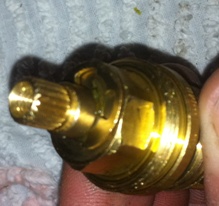
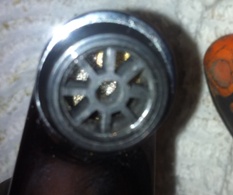
Obviously, changing a tap washer is a fairly common thing, but servicing the tap at the same time will extend its life greatly. This guide will show you how to repair most tap problems. I will go through it from top to bottom, just pick out the stuff relevant to your situation. Initialy, turn the water off to the tap, if your not sure how, see here . Comment - if your tap is a quarter turn type, just get out the insert, take it to the merchant and get another - they are not repairable - if your not sure the insert looks like the one in the picture here.
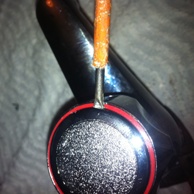
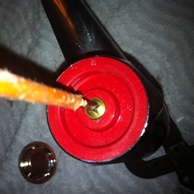
First of all you need to get the head off. Most taps have a screw going down through the head into the spindle shaft, usualy under a cap. The cap will either prise off, (use a knife blade) or unscrew. Look carefully and it will be obvious. Some taps have a small screw crosswise into the shaft, usualy just below the main head. Either way, expect a bit of a fight to get the head off.
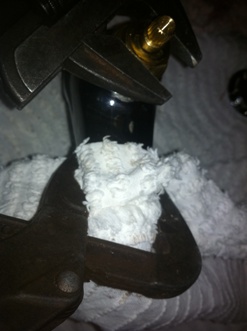
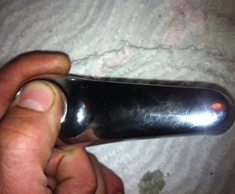
Now the head is off, the tap insert is visible, (sometimes a shroud needs removing first), grip the tap as shown, note the cloth to protect from scratches, as a basin/sink is not that strong, and unscrew the insert. If you end up rotating the tap, most likely you will make it leak underneath, so be careful.
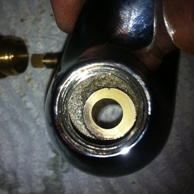
Now you have the guts of it out, have a quick look at the seat, check for errosion or pits, if there is, a tool to reseat it can be bought for about 15 quid - a cheap tap is seven quid.... only do this if you cannot change the tap - old / part of a set / impossible to remove.
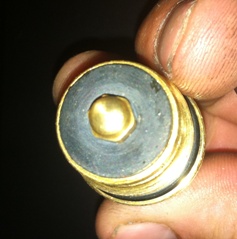
The section you have removed now needs attention. Inspect the washer, replace if required, in an emergency, turn it over to get a better surface. A good washer is circular, flat, flexible and soft, without any ridges or cracks. You can cut another washer to fit if needed, also, a piece of rubber can be cut to fit (not ideal).
Holding the main section, rotate the spindle to drop out the carrier. prise off the circlip, and push out the spindle - push it down in the direction of the carrier.
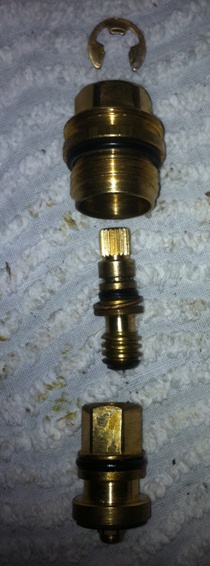
Inspect all parts, the spindle often has several o rings which should be free of splits and cracks, the thread should be 'square topped' not sharp, (blunt thread projections). The washer carrier which also sometimes has O rings, should have a good thread, (female). There should be no appreciable wear on the spindle. Take some silicone grease, liberaly coat the spindle, O rings, carrier and main body of the guts. Take the spindle and screw it into the carrier several times, making sure it goes all the way down, feel for snagging and roughness (bad), also, if you have put in enough grease it will 'hydraulic lock' at the bottom of the carrier, as the spindle compresses the grease, slowly and firmly screw it down, forcing the grease into all crevices, then screw in/out a few times to make sure its now free. Pop a drop of grease into the carrier/body and slide the spindle back in and put the circlip back on. Place the washer carrier into place and unscrew the handle, this should draw the carrier down into the body. If it doesnt and it snags, rotate the carrier a tiny bit and try again ( remember the washer carrier doesnt rotate, and it is hanging up on the sides). Open and close it a few times and it should be smooth. If not, regrease or replace.

Inspect the washer/ O ring between insert and body, it should be good and free of cracks. Grease the thread and washer, screw the tap 'open' and screw back into the body, hand tight, making sure its seated all the way, now nip up tight. Now pop the head back on.
While we are here, also descale the tap outlet, spray on descalers are available, or scrape it off, (vinegar works too but its slow) some tap ends can be unscrewed for servicing, these have little filter screens inside to clean.
In an emergency, if you cant turn off the water to the tap, and you have to do fix the tap (stuck / sized / leaking etc). Turn on all taps served by the the supply to this tap, including draining tanks so the ballvalves are open, flushing toilets etc. This will reduce the flow to THIS tap. Now take a deep breath, dig deep, and wind out the centre/guts of tap. The water flow will astonish you. Do all you can before you start to make sure this water wont damage anything. (hopefully it will all go down the drain, but...) Place your hand over the opening, this will divert the water to the tap outlet. Have a friend repair the insert, or tie a cloth over the tap to keep the flow going down the drain, then take the repaired insert in your other hand, release the body / cloth etc, and screw it in. Do this by hand, DO NOT force it, if you cross thread it your in trouble. It may take several attempts, be patient, dont panic. (easier said than done, I know) I do not advise this repair!
Valve Notes
- If you decide to you can just change the tap inserts, but take the old one with you to the merchant - there are about 250 types. You have to match the pattern the head sits on,(or new heads too), the height, the thread, the washer size etc.
- If its tricky, consider changing the tap
- Working on live mains water is the quickest way to a flood