 Guides
 Dangers
- Flood
- Electrocution
- Screwdrivers
- Multimeter
- Assorted Wrenches
- Multimeter
- Multimeter If in doubt call a Professional!!
Tools needed
Stuart Turner Pumps
READ THE DANGERS SECTION
The idea of this is so you get an idea of your pump, so you know if your engineer is doing his job correctly, if you attempt a repair yourself,be careful
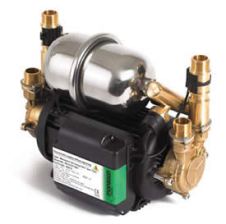
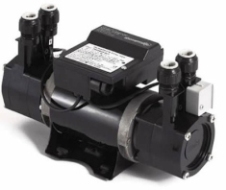
There are several types of this pump, but the main categories are 'Monsoon' and 'showermate' , as a guide,
IE - 4 pipes, round vessel on top, brass ends = twin negative head monsoon, or, 2 pipes, plastic body = single showermate
But why worry? Its specs are written on the top of the control box!
Im going to start with looking at a DEAD pump, working pump faults are lower down the page.

Obviously, firstly check the fuse. Then isolate the pump and take off the control box head - 4 screws.
Inside is a white cylinder and a control board.
Take a quick look at the cylinder (start capacitor) your looking for splits, cracks, bulges or leaks. The standard symptom of a failed start capacitor is a pump that 'humms' but doesnt pump. If its ok, pop it back in place. (note - it still may be dead, but we test more later.)
With a small piece of jumper cable, bridge the incomming live (marked L) to the motor live, marked 'M', you will know if your right as your connecting the motor brown wire to the incoming brown). Now, while standing back, power up the pump, and see if it runs. Do this for a few seconds only.
If it runs, the motor and capacitor are ok, its the board or sensors at fault
If it humms, the capacitor is dead, or the pump is jammed. rotate the pump spindle to check which (see later)
If its silent, the motor is dead, game over, new pump needed.
Assuming the pump motor runs, lets look at the possible issues. Either the sensors or PCB board are at fault - we cant test the pcb, so we will test the sensors, and if ok, assume board.
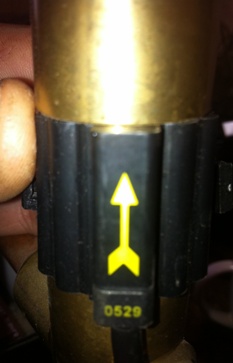
The positive type pumps have just these sensors, which are activated by a small magnet inside the tube which jumps up, as water flows up. Test by uncliping and subjecting to magnet. If pump runs, fault is with internal magnets, Usualy jammed.If not, bridge the sensor wires at the board, if nothing happens, board is dead, if it now runs, sensor is faulty.
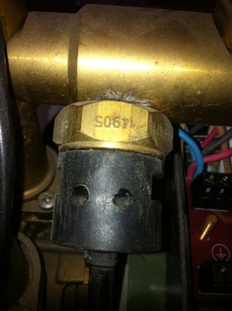
A negative head pump has this pressure sensor too. This is the primary sensor, It should be closed circuit if there is no pressure in the system. Try jumping a wire across the sensor to see if the pump fires. If it does, then this sensor is at fault. If you do this with the tap open, and the pump cuts out after 10 seconds, its the flow switches too, in the negative pump, the pressure sensor 'hands over' control to the flow switches after 10 seconds, so if they havent closed, it stops. (stops the pump running dry)
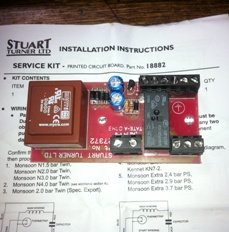
If jumping or activating the sensors gives nothing, fit a new control board. All spares are available from stuart turner themselves, Their spares department is very efficient and helpful, and almost all parts are available. Best to call them on 01491 572655
All parts come with a full fitting guide
If there is a further problem, or you suspect stuck magnets, or a seized pump, Isolate the water supply, drain, and remove one pump head. (four screws) With the head off you can check for free rotation, if its stuck, strip it further - look lower down at the 'leaks and seals' section, but a stuck motor cannot be fixed.
Remove the outlet pipes above the sensors, look down the holes and you will see a small wire clip holding a magnetic float in place, remove both and inspect for splits, cracks, limescale deposits and the like, when replacing make sure the float moves freely and the clip is properly in place. If you dont find a float or a clip, then its gone up the pipe! The float goes sharp end down.
Lets now look at some pump problems, This may seem a strange place to put this, but, you will then know from your symptoms, what to do.
1) Pump runs on/off/on/off - air in system, not a pump fault, run all taps served by the pump for a few minutes. If this doesnt help, look for 'dead legs' in the system - pipes that are capped and trap air - supplies to an old bathroom etc.
2) Pump runs occasionaly for a few seconds - one of three possibilities
-Water leak in system - check for dripping taps, leaking ballvalves etc
- Expansion vessel flat or burst - silver vessel on the side/top of pump. - de pressurise the pump / isolate the water and run taps till empty, then with an ordinary car/bicycle hand pump, repressurise the vessel to 0.9 bar, through the valve on the end of the vessel. Before you do this, just depress the center of the valve a little to see if any water comes out - water = burst, replace vessel.
-leaking non return valves - strip pump as below
3) Pump wont activate till shower head lowered to level of bath taps or below - insufficient head of water - fit a negative head pump instead. -
4) Water 'surges' from taps - supply problem to pump, check the filters in the pump, also check the pump is correctly plumbed in - has its own dedicated supply from cylinder - either by essex or surrey flange.
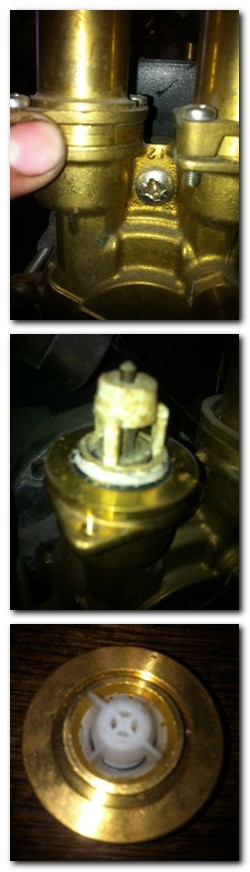
If your non return valves are leaking back, then they must be removed and cleaned or replaced. The valves are located on the outlet pipes, just above the pump body. Remove the sensor body, and the valve is sandwiched between that and the pump housing. Clear debris from the valve, or replace.

Shaft seal leaks..... If your pump leaks from here, you need a new shaft seal. This is quite labour intensive, and the outcome depends on how much care you take in doing it.
Idealy you need a puller, heres one supplied to me by Stuart Turner. It is possible to do it with a pair of screwdrivers, but this is better.
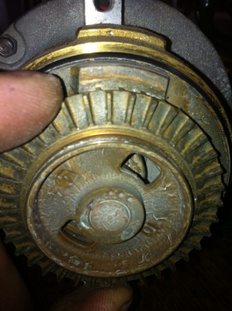
First remove the impellor, it will be jammed, so be patient and dont bend it or the shaft its mounted on
So here it is removed, note the woodruff key
Remove the key, usualy a screwdriver will do this
Now prise off the circlip holding the seal in place, and slide the main body and both seals off the motor
This is what your left with
This is your biggest problem. The scale on the shaft must be removed, but without scratching the shaft.
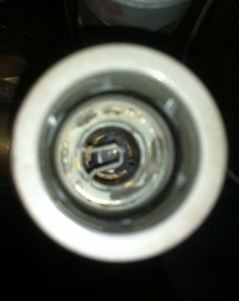
This is the outer seal, prise it out from its seat, clean the a seat area, and push the new one home. check it sits fully home by turning the housing over and inspecting from the other side.
To do this job correctly, you must understand how this seal works. the graphite outer face, of the inner seal, seals against the face of the outer seal you have just fitted, the inner rubber lip seals to the shaft, and the spring holds the graphite faces together..
That means the graphite faces must align, hence the checking of the outer one for correct seating, and the spring must be able to press the two together.
There is a massive obstacle to this however, the inner rubber lip seal is a tight fit on the shaft, and if the shaft is not totaly clean the seal will not go fully home, and the spring will not be able to seat the two seals against each other. As far as i remember, the only lubrication you are permitted is water, so wet the shaft and make sure the seal slides easily.To refit, put the main body back, on the motor, with new seal installed, slide the spring seal down onto the shaft with the supplied tool, ( black jobby), but put a little bit of sticky tape over the end of the shaft to prevent the keyway cutting the lip seal. Press fully home, past the circlip groove, till the inner seal is tight to the outer, hold in place and fit the spring and circlip. Do not dislodge the rear pump body or it will move the seal. Fit the woodruff key, and impellor. The impellor MUST be able to slide freely on the shaft, if not, remove and clean shaft, key and impellor hole. And thats it! ......... um, yeah, if / when you have trouble with that, go to the chemist, get some ky jelly or similar, and lube the shaft with that. Stuart turner wont like the idea, but it says it wont harm rubber, so..... I have used silicone grease, but i dont advise you do. If the spring cannot overcome the resistance of the shaft lip seal, on the shaft, it WONT SEAL.
Things that will kill your pump
- Water over 65 degrees C.
- Plumbing it into the mains
- Trying to silence it by boxing or insulating it - (overheats)
- No dedicated supply from cylinder
- Power surges - kills PCB
- Undersized pipework