 Guides
 Dangers
- Noah size flood
- Screwdrivesr
- Wrench
- PTFE tape
- Silicon grease If in doubt call a professional plumber!!
Tools needed
Help Forum!
Stopcock repair
READ THE DANGERS SECTION
The idea of this is so you get an idea of your system, so you know if your engineer is doing his job correctly, if you attempt a repair yourself,be carefull
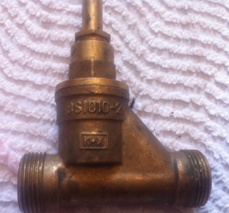
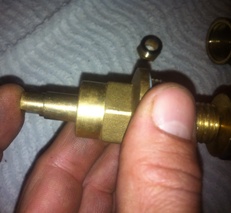
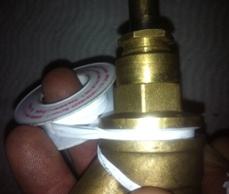
This is a stopcock. If yours doesnt look like this, try looking at gate valve repair. The usual issues with stopcocks is either seized or leaking, be it internal or external. I will go through it top to bottom, skip the sections that dont apply to your situation.
Due to a shocking lack of relevant keywords in this page, here are some to boost my ranking! Plumber, plumbing, bathroom, boiler, tap, toilet.
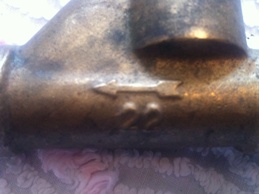
Ok, a stopcock has to be the right way round, if it isnt, it will intermittently lock closed. There is an arrow to show direction of flow. The guide below will probably seem backwards for your situation, but its the most sensible way to go through it.Most people will be looking at this to repair a drip from the gland, not a full strip and service, so skip to the bottom.
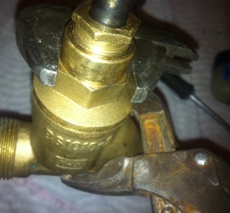
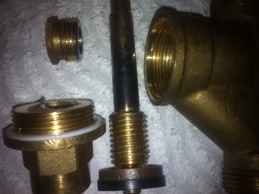
Ok, initialy, make sure the water is off and the system is drained, or your going to get wet. Open the stopcock all the way then close it 1-2 full turns. Holding the body of the valve with a wrench to prevent the pipework getting strained, unscrew the guts of the valve from the body.
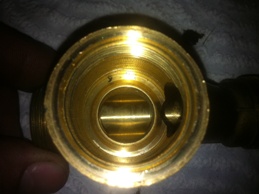
Now you have the guts of it out, have a quick look at the valve seat, check for errosion or pits, if there is, a tool to reseat it can be bought for about 15 quid - a stopcock is seven quid.... only do this if you cannot change the stopcock - if its on lead or buried etc.

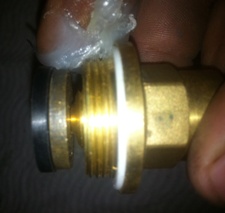
The section you have removed now needs attention. Inspect the washer, replace if required, in an emergency, turn it over to get a better surface. A good washer is circular, flat, flexible and soft, without any ridges or cracks. You can cut another washer to fit if needed, also, a piece of rubber can be cut to fit (not ideal).
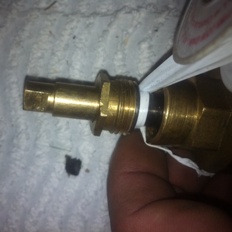
Holding the main section, rotate the handle to drop out the carrier. Unscrew the head and gland nut, and push out the spindle - push it down in the direction of the carrier.
Inspect all parts, the spindle often has several o rings which should be free of splits and cracks, the thread should be 'square topped' not sharp, (blunt thread projections). The washer carrier which also sometimes has O rings, should have a good thread, (female). There should be no appreciable wear on the spindle. Take some silicone grease, liberaly coat the spindle, O rings, carrier and main body of the guts. Take the spindle and screw it into the carrier several times, making sure it goes all the way down, feel for snagging and roughness (bad), also, if you have put in enough grease it will 'hydraulic lock' at the bottom of the carrier, as the spindle compresses the grease, slowly and firmly screw it down, forcing the grease into all crevices, then screw in/out a few times to make sure its now free. Pop a drop of grease into the carrier/body and slide the spindle back in. put the gland nut back in, finger tight and the head back on. Place the washer carrier into place and unscrew the handle, this should draw the carrier down into the body. If it doesnt and it snags, rotate the carrier a tiny bit and try again ( remember the washer carrier doesnt rotate, and it is hanging up on the sides). Open and close it a few times and it should be smooth. If not, regrease or replace. Nip up the gland nut till resistance on the shaft is felt, but not too much. NOTE - the picture shows a valve WITHOUT a seperate spindle / washer carrier)
Inspect the washer between guts and body, it should be good and free of cracks. Grease the thread and washer, screw the stopcock 'open' and screw back into the body, hand tight, making sure its seated all the way, now nip up tight. Note - this washer is hard to buy, so if damaged, replace with ptfe tape rolled into a thin 'sausage'.
If the stopcock leaks from gland nut, try nipping it tighter, just by little turns, trying the handle every time to make sure it still turns. If still leaking, remove the gland nut, and run a turn or two of ptfe round shaft, pushing it into the valve with the gland nut and retighten. This is the usual problem / reason why you are here, its usualy possible to do with the water on, without too much trouble.
Leaking washer between body/guts can be repaired LIVE, if you have a flood wish, and significant minerals. its best done by closing the valve, unwinding the guts 1/2 - 3/4 turn, nip the valve closed a little more, scrape out the old washer from the exposed gap and run ptfe around a couple of times. Open the valve a full turn and tighten the body back down. BE AWARE, significant water may escape, the washer may be reluctant to leave, making the situation worse, the valve may pop appart, (have your dingy ready), and make sure your home and contents insurance is up to date!

In an emergency, if you need the valve to work, but it wont, find an IDENTICAL valve, remove the guts, grease the thread and set aside. Turn on all taps served by the stopcock, including draining tanks so the ballvalves are open, flushing toilets etc. Now take a deep breath, dig deep, and wind out the centre/guts of valve. The water flow will astonish you. Do all you can before you start to make sure this water wont damage anything. Place your hand over the opening, this will divert the water to the open taps. Take the new valve section in your other hand, release the body, and screw in the new section. Do this by hand, DO NOT force it, if you cross thread it your in trouble. It may take several attempts, be patient, dont panic. (easier said than done, I know) I do not advise this repair, have the number of a disaster recovery company ready.....
Valve Notes
- Gland nuts do leak. dont be afraid to nip them tighter
- If its tricky, consider fitting another stopcock further on in the system rather than fixing original stopcock
- Working on live mains water is the quickest way to a flood